How DBSnapper Works
Architecture Overview
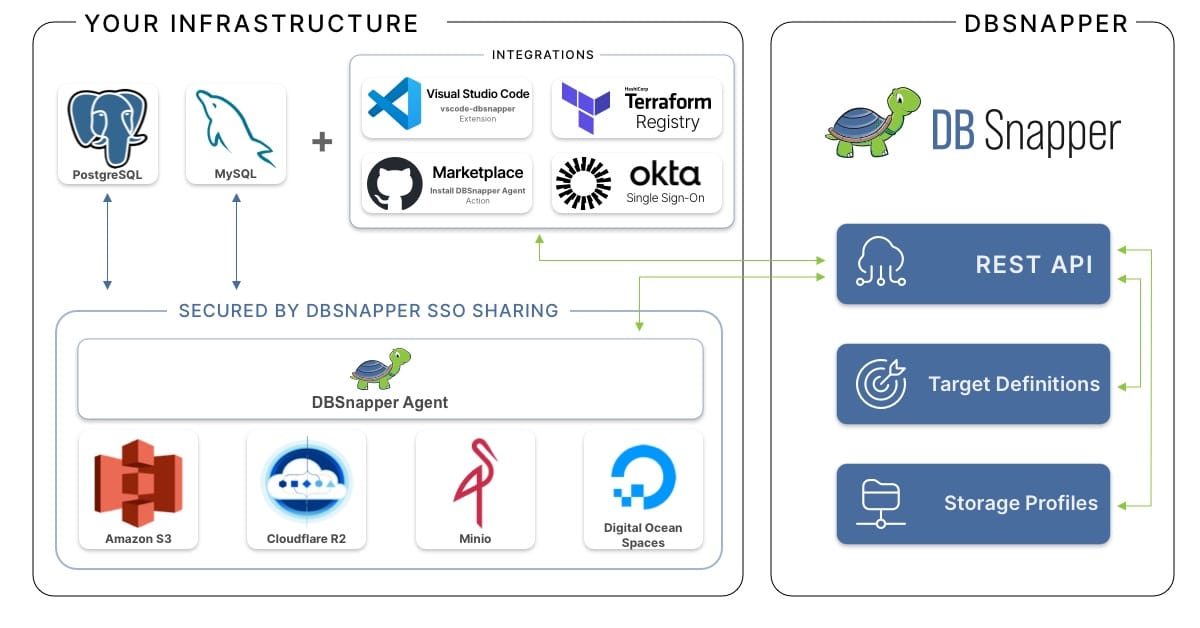
DBSnapper Architecture Overview
The DBSnapper architecture is designed to provide a safe, secure, and fast way to create and share database snapshots. The architecture is built around a bring-your-own-infrastructure model, keeping data within your control at all times. Our focus on integrations ensures that DBSnapper can seamlessly fit into your existing workflows and tools, providing automation and ease of use for your team.
Step 1: Snapshot Your Database
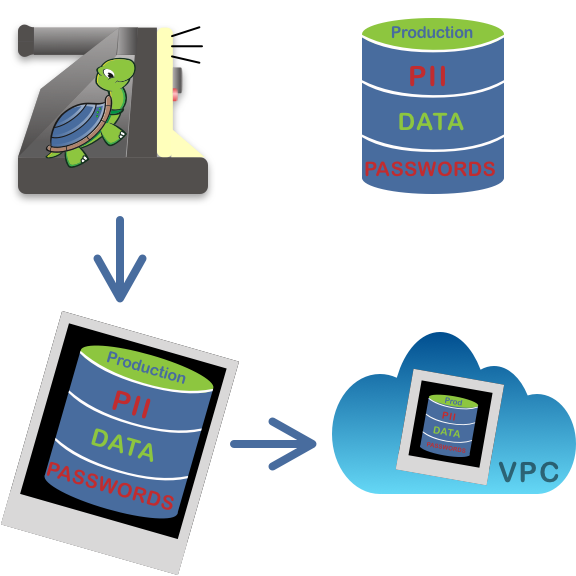
Begin by using the DBSnapper Agent to create a snapshot of your database. This snapshot captures a point-in-time backup of the current state of your database. Use the DBSnapper cloud to upload the snapshots into your own private storage provider
Step 2: Sanitize Sensitive Data

The next crucial step is sanitizing your snapshot. DBSnapper provides tools to remove sensitive data and Personally Identifiable Information (PII) efficiently. This process is essential for maintaining privacy and compliance with data protection regulations. The de-identification feature ensures that your development and testing environments are safe for use without compromising on data integrity.
DBSnapper allows you to remove sensitive data and Personally Identifiable Information (PII) from the snapshot, ensuring de-identification is straightforward and efficient.
Step 3: Share with your team
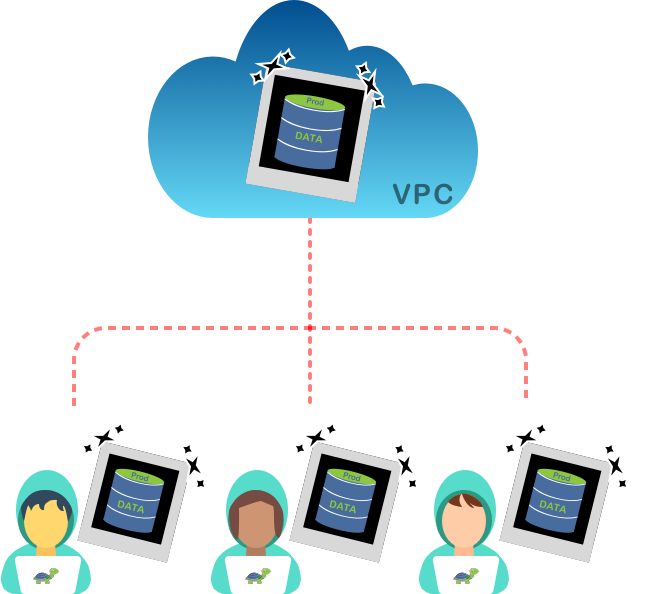
After sanitization, it's time to share the snapshot with your team. DBSnapper facilitates easy and secure sharing directly from your private cloud storage. This step is instrumental in speeding up the software development process, as your team gets access to realistic, yet secure, user data. Whether it’s for development, testing, or staging, your team can work with data that mirrors the production environment, enhancing the accuracy and efficiency of your workflows.
Get Started
Sign up and get running with DBSnapper, add integrations to take advantage of automation, and start sharing database snapshots with your team today.