Single Sign-On (SSO) Integration with Okta
DBSnapper supports Single Sign-On (SSO) with Okta - this guide will walk you through the steps to configure Okta OIDC for your DBSnapper organization using the Okta Integration Network (OIN) catalog.
Supported Features
- SP initiated Auth Flow: SSO Using OIDC initiated via DBSnapper Cloud
- Open ID Connect (OIDC): Yes
- Proof Key for Code Exchange (PKCE): Yes
- Just-in-Time Provisioning: Yes
Step 1: Add the DBSnapper Application from the OIN Catalog
Sign into your Okta account and navigate to Admin/Applications. Click on the Browse App Catalog button.
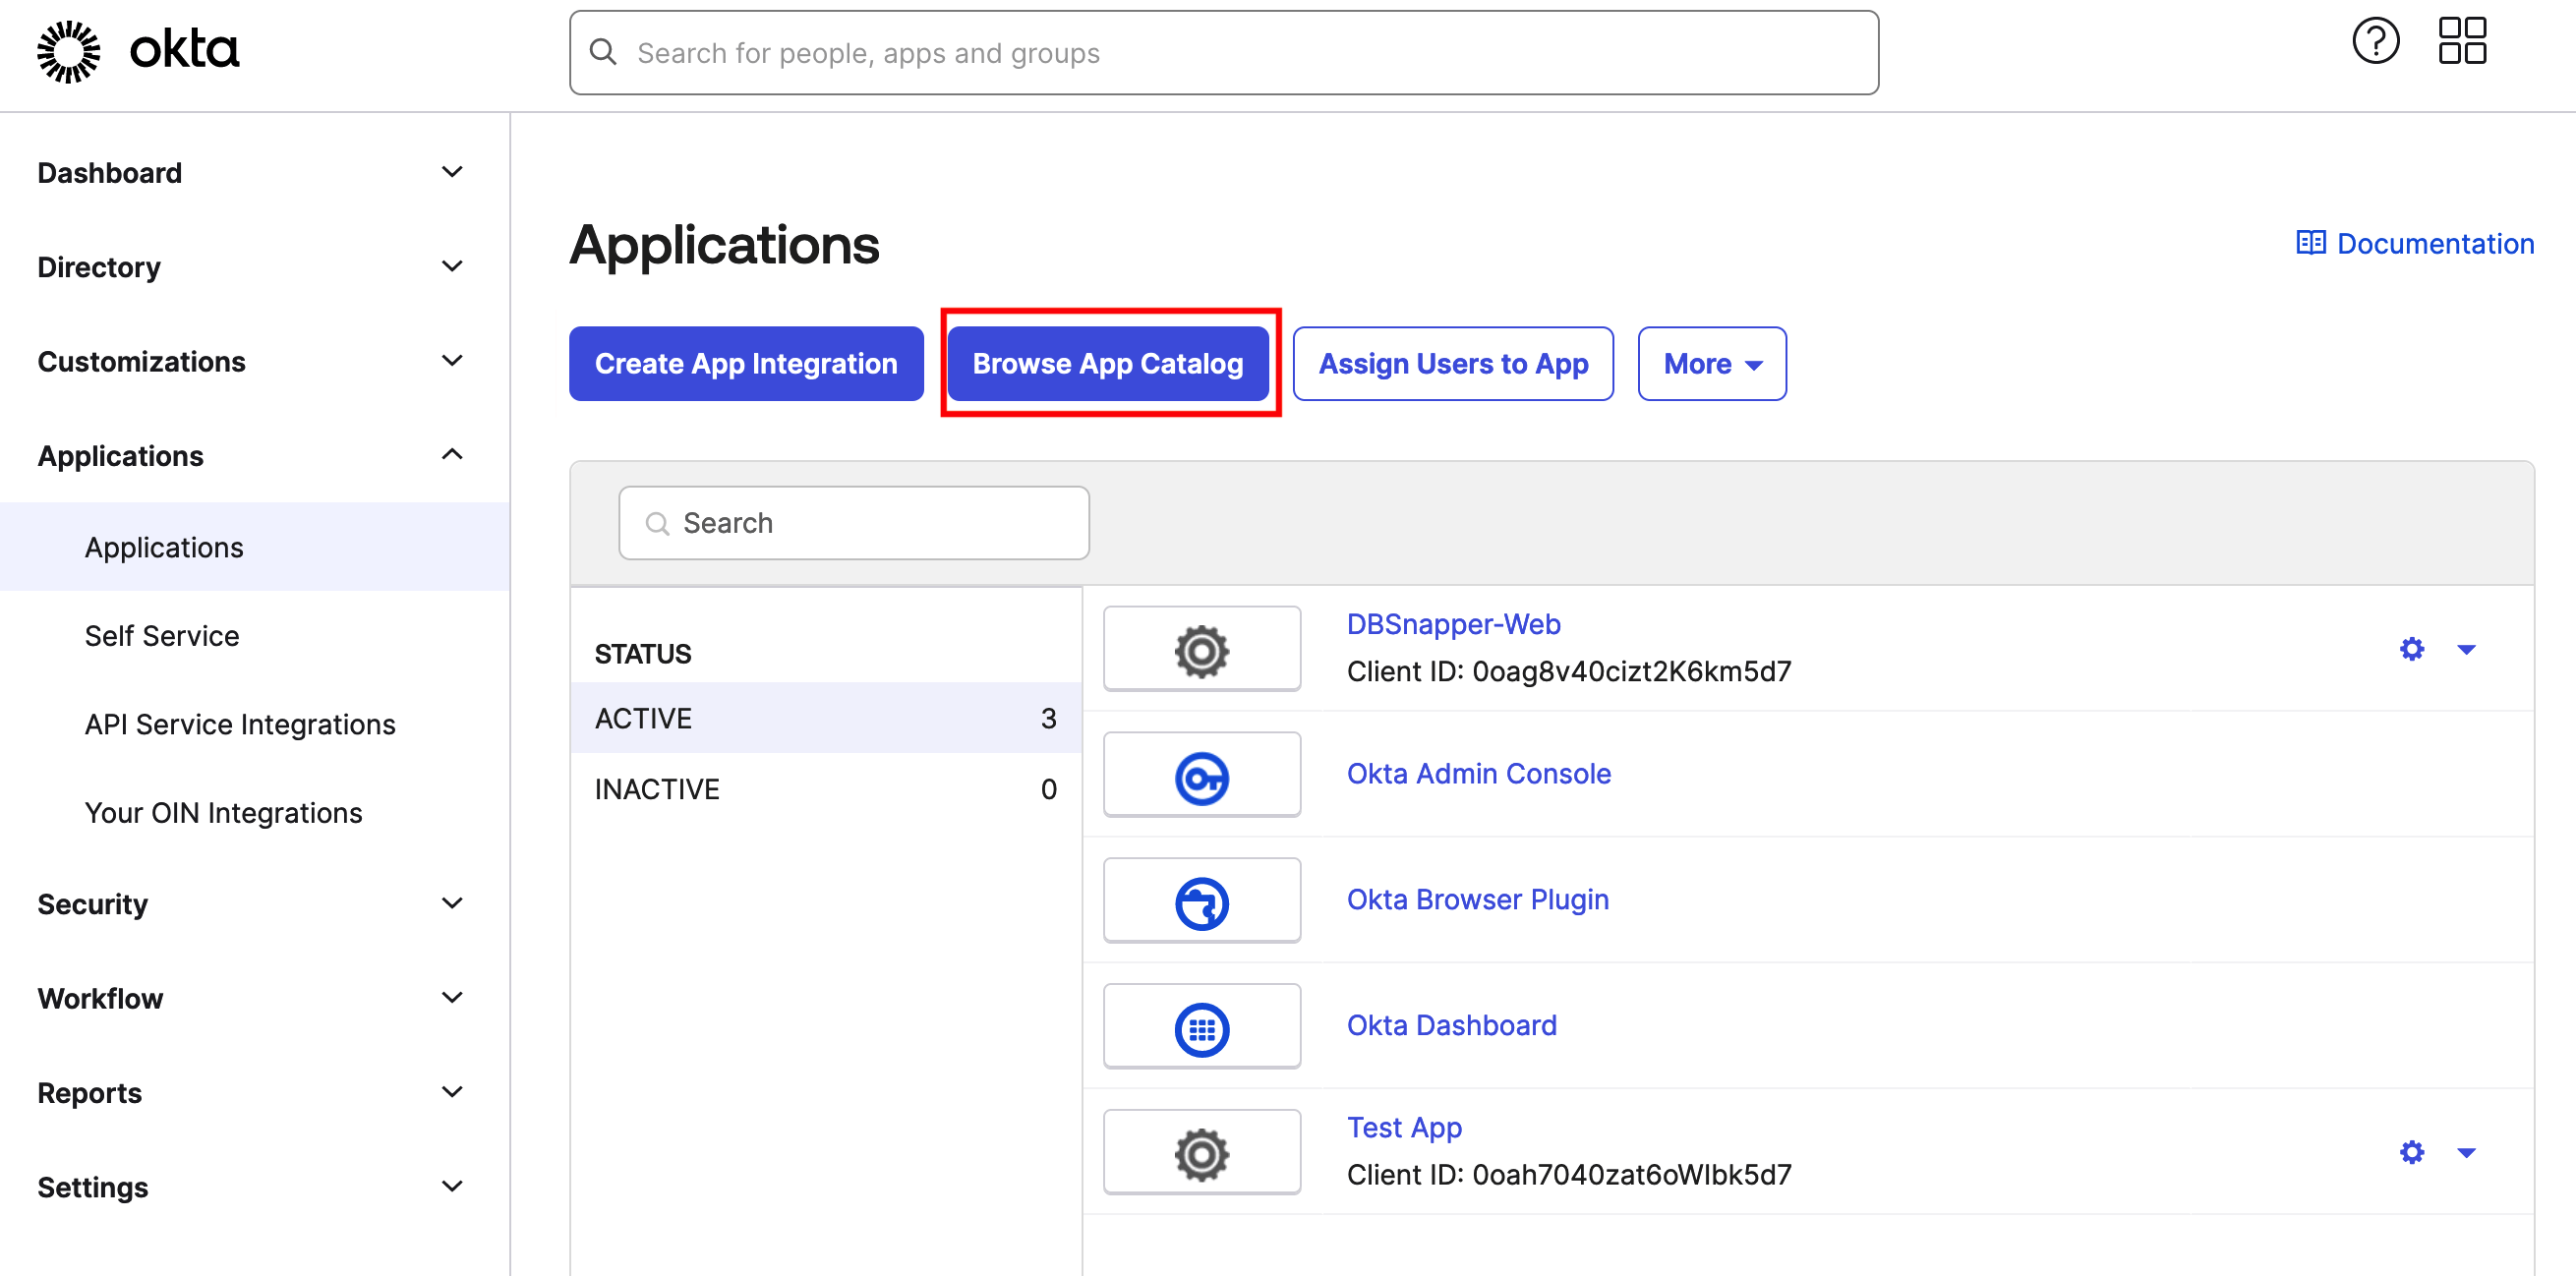
Step 1.1 - Okta SSO - Applications
Search for and add the DBSnapper application from the catalog.
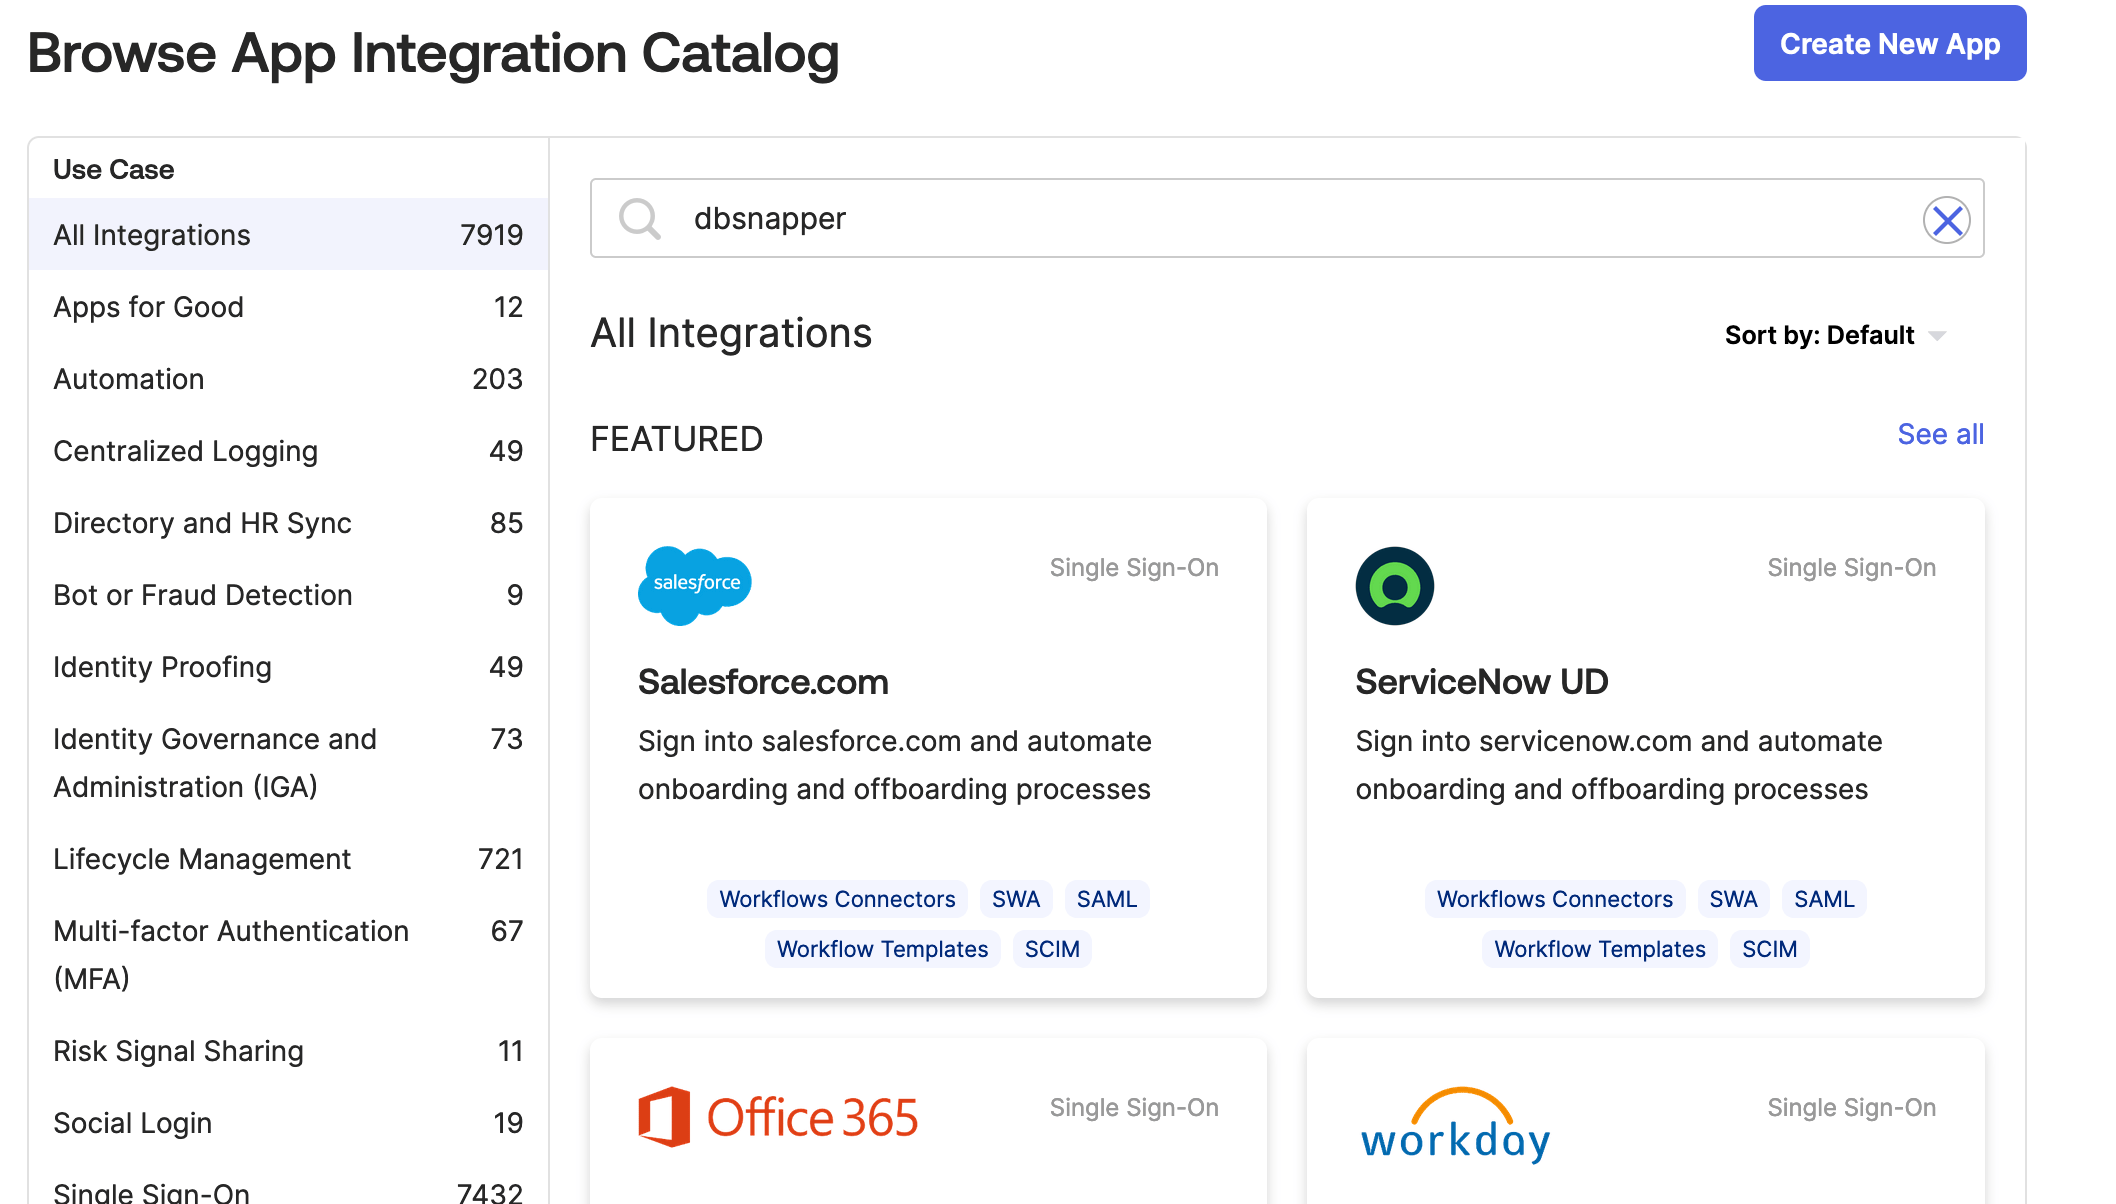
Step 1.2 - Okta SSO - Add DBSnapper from Okta Integration Network (OIN)
Take note of your application credentials which will be used in the DBSnapper Cloud SSO settings:
- Client ID - a public identifier for the client application
- Client Secret - Click to reveal the client secret and make note of it.
Step 2: Configure DBSnapper for Okta OIDC
Sign into your DBSnapper Cloud account and navigate to the Settings -> SSO page. Click on the No SSO Tenant Found - Add a Tenant button.
Add the settings from the Okta application you created in Step 1:
- Provider - Okta - OIDC (the default)
- Client ID - From the DBSnapper application settings in Okta
- Client Secret - From the DBSnapper application settings in Okta
- Issuer - Your Okta domain URL (e.g.
https://example.okta.com)
Note that the Organization Domain and Redirect URL are pre-filled for your organization. Make sure the Organization Domain matches the email domain of your users' email addresses.
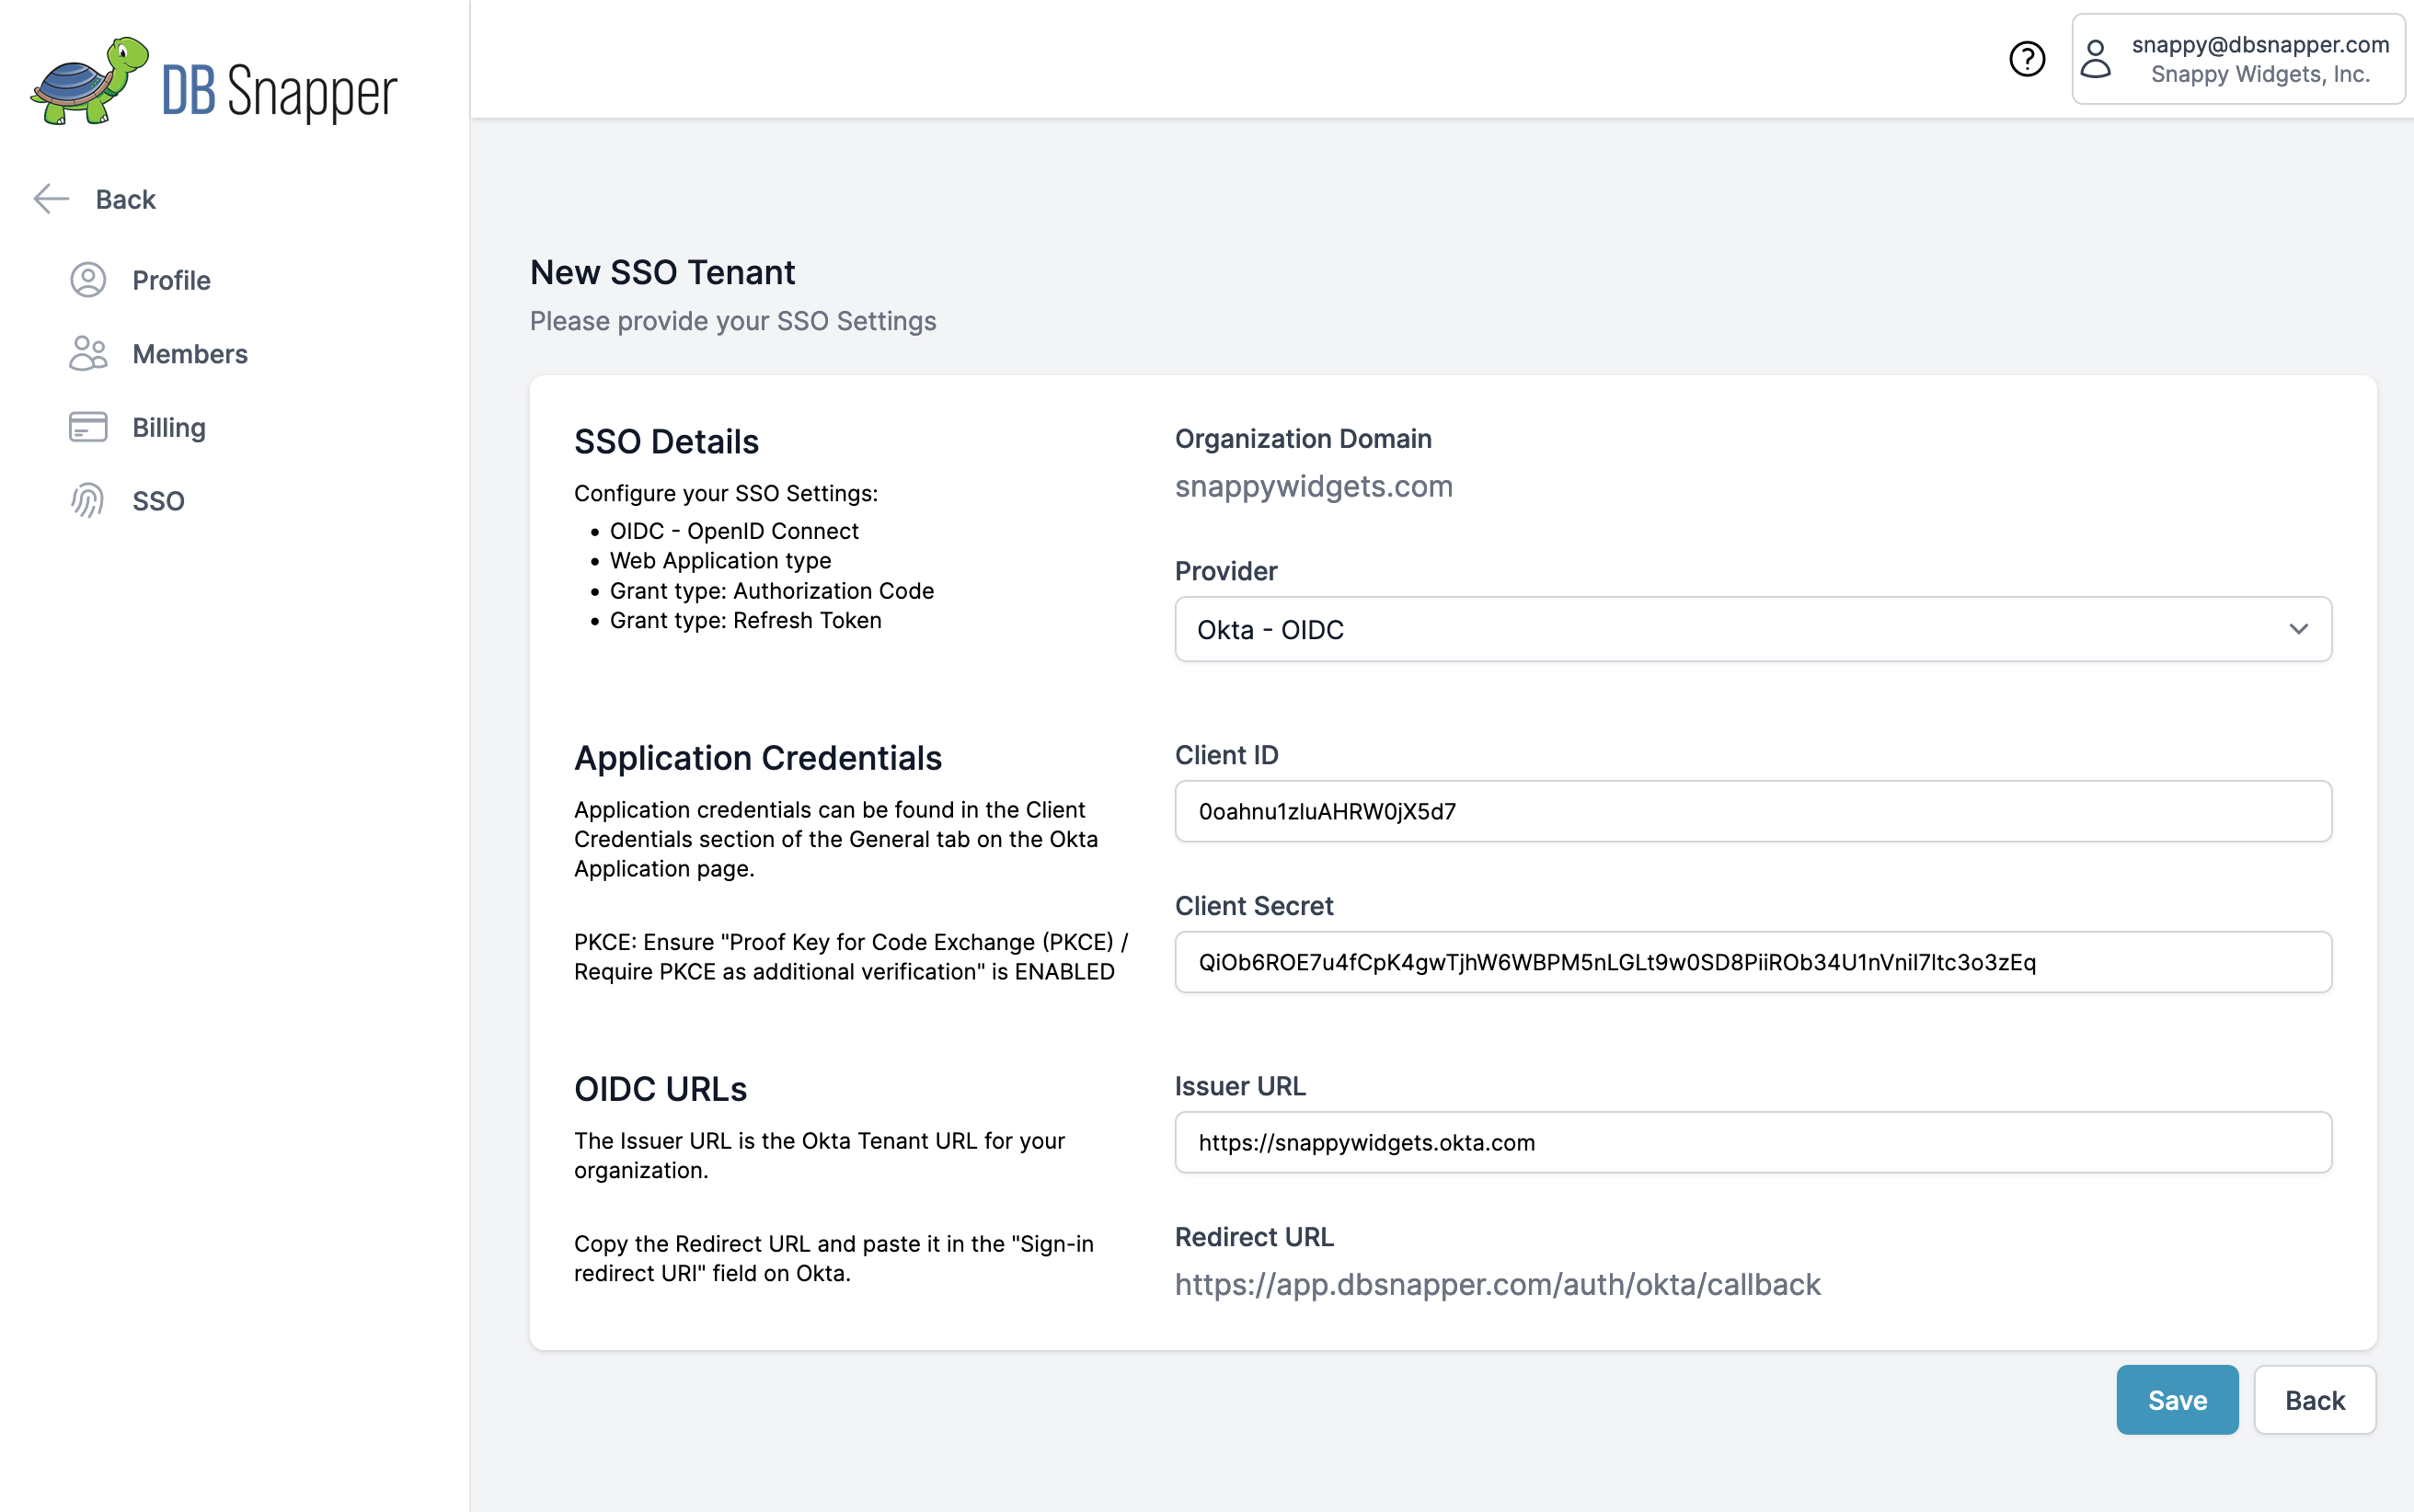
Step 2.1 - Okta SSO - Create new SSO Tenant in DBSnapper
Click Save to save the new SSO Tenant for your organization. You should see your new SSO Tenant settings shown on the SSO page.

Step 2.2 - Okta SSO - SSO Tenant Created in DBSnapper
Congratulations you have successfully configured Okta OIDC for your DBSnapper organization.
Usage Instructions
- For SP Initiated Auth, visit the DBSnapper Cloud sign in page enter your email address, click Next, and then and click on the
Signn in with SSObutton.