Part 2: Using DBSnapper, GitHub Actions, and ECS - A Simplified Approach
Overview
Note: This is Part 2 of a multi-part series on using DBSnapper with GitHub Actions and Amazon ECS. Go here to read Part 1.
Third Party GitHub Runners
This article provides an alternative approach to using DBSnapper with GitHub Actions and Amazon ECS. This article uses a GitHub runner built by a third party. There are actually several nice third-party runners that build upon the official GitHub Actions runner, and provide additional capabilities that the official runner doesn't yet support. You can find a list of these runners on the Awesome-runners list. For this article we are using the myoung34 GitHub Runner.
The previous version of this article used the official GitHub Actions runner to run the DBSnapper Agent in an Amazon ECS Fargate Task. We've found that there are third-party runners that provide additional capabilities that the official runner doesn't yet support. We will present the simplified approach using the myoung34 GitHub Runner in this article. We will be brief in our explanation of the steps, as they are similar to the previous article.
Using the myoung34 GitHub Runner
The myoung34 GitHub Runner is a third-party runner that builds upon the official GitHub Actions runner. This runner makes use of environment variables to configure the runner and and most importantly supports an ACCESS_TOKEN environment variable that will take care of registering the runner with the GitHub Actions service. This eliminates the need for the first step in the previous article where we had to get a registration token to register the runner with GitHub.
Simplified GitHub Actions Workflow
In this workflow we only have three jobs instead of the four in the previous article. We describe some of the important changes below:
| Simplified GitHub Actions Workflow | |
|---|---|
1 2 3 4 5 6 7 8 9 10 11 12 13 14 15 16 17 18 19 20 21 22 23 24 25 26 27 28 29 30 31 32 33 34 35 36 37 38 39 40 41 42 43 44 45 46 47 48 49 50 51 52 53 54 55 56 57 58 59 60 61 62 63 64 65 66 67 68 69 70 71 72 73 74 75 76 77 78 79 80 81 82 83 84 85 86 87 88 89 90 91 92 93 94 95 96 97 98 99 100 101 102 103 104 105 106 107 108 109 110 111 112 113 114 115 116 117 118 119 120 121 122 123 124 125 | |
The first job in this workflow involves setting up and starting the ECS task definition that will launch the myoung34 GitHub Runner. The biggest difference here is in the Update Task Definition JSON step starting on line 33. Instead of creating a command to run the runner as we did in the previous article, we instead update the task definition JSON file to include the necessary environment variables for the runner on lines 42-67. The environment variables we set are:
- ACCESS_TOKEN: We provide our Fine-Grained Personal Access Token (FG_PAT) as a secret to the runner. This token is used to authenticate the runner with GitHub Actions, saving us the step of registering the runner with GitHub which was necessary in the previous article.
- RUNNER_SCOPE: We set the runner scope to
orgto allow the runner to access all repositories in the organization. - ORG_NAME: We provide the organization name to the runner.
- EPHEMERAL: We set the runner to ephemeral mode, so it will be deregistered from the GitHub Actions service when the task is stopped.
- LABELS: We provide a label to the runner to identify it as an ECS runner - customize this as you see fit.
- RUNNER_NAME_PREFIX: We provide a prefix for the runner name to identify it in the GitHub Actions service.
There are several other environment variables you can use to configure the runner. You can find more information on the myoung34 GitHub Runner page.
Database Utilities Needed
When using the DBSnapper container image, the Agent and database utilities are already included in the image. Since GitHub Actions doesn't support Docker containers, we need to install the tools by hand. In this case, we install the PostgreSQL client on line 103 to support the snapshot of our Postgresql RDS database. If you are using a different database, you will need to install the appropriate client.
Since our target defintion is using connection string templates for added security, we've set the DATABASE_USERNAME, DATABASE_PASSWORD, and DATABASE_HOST environment variables to the appropriate secrets on lines 89-91.
The rest of the workflow is similar to the previous article, with the dbsnapper job installing and running the DBSnapper Agent to build a snapshot and the deprovision job stopping the ECS task.
Task Definition
The task definition JSON file is similar to the one in the previous article, we're including it here for completeness.
Target Settings
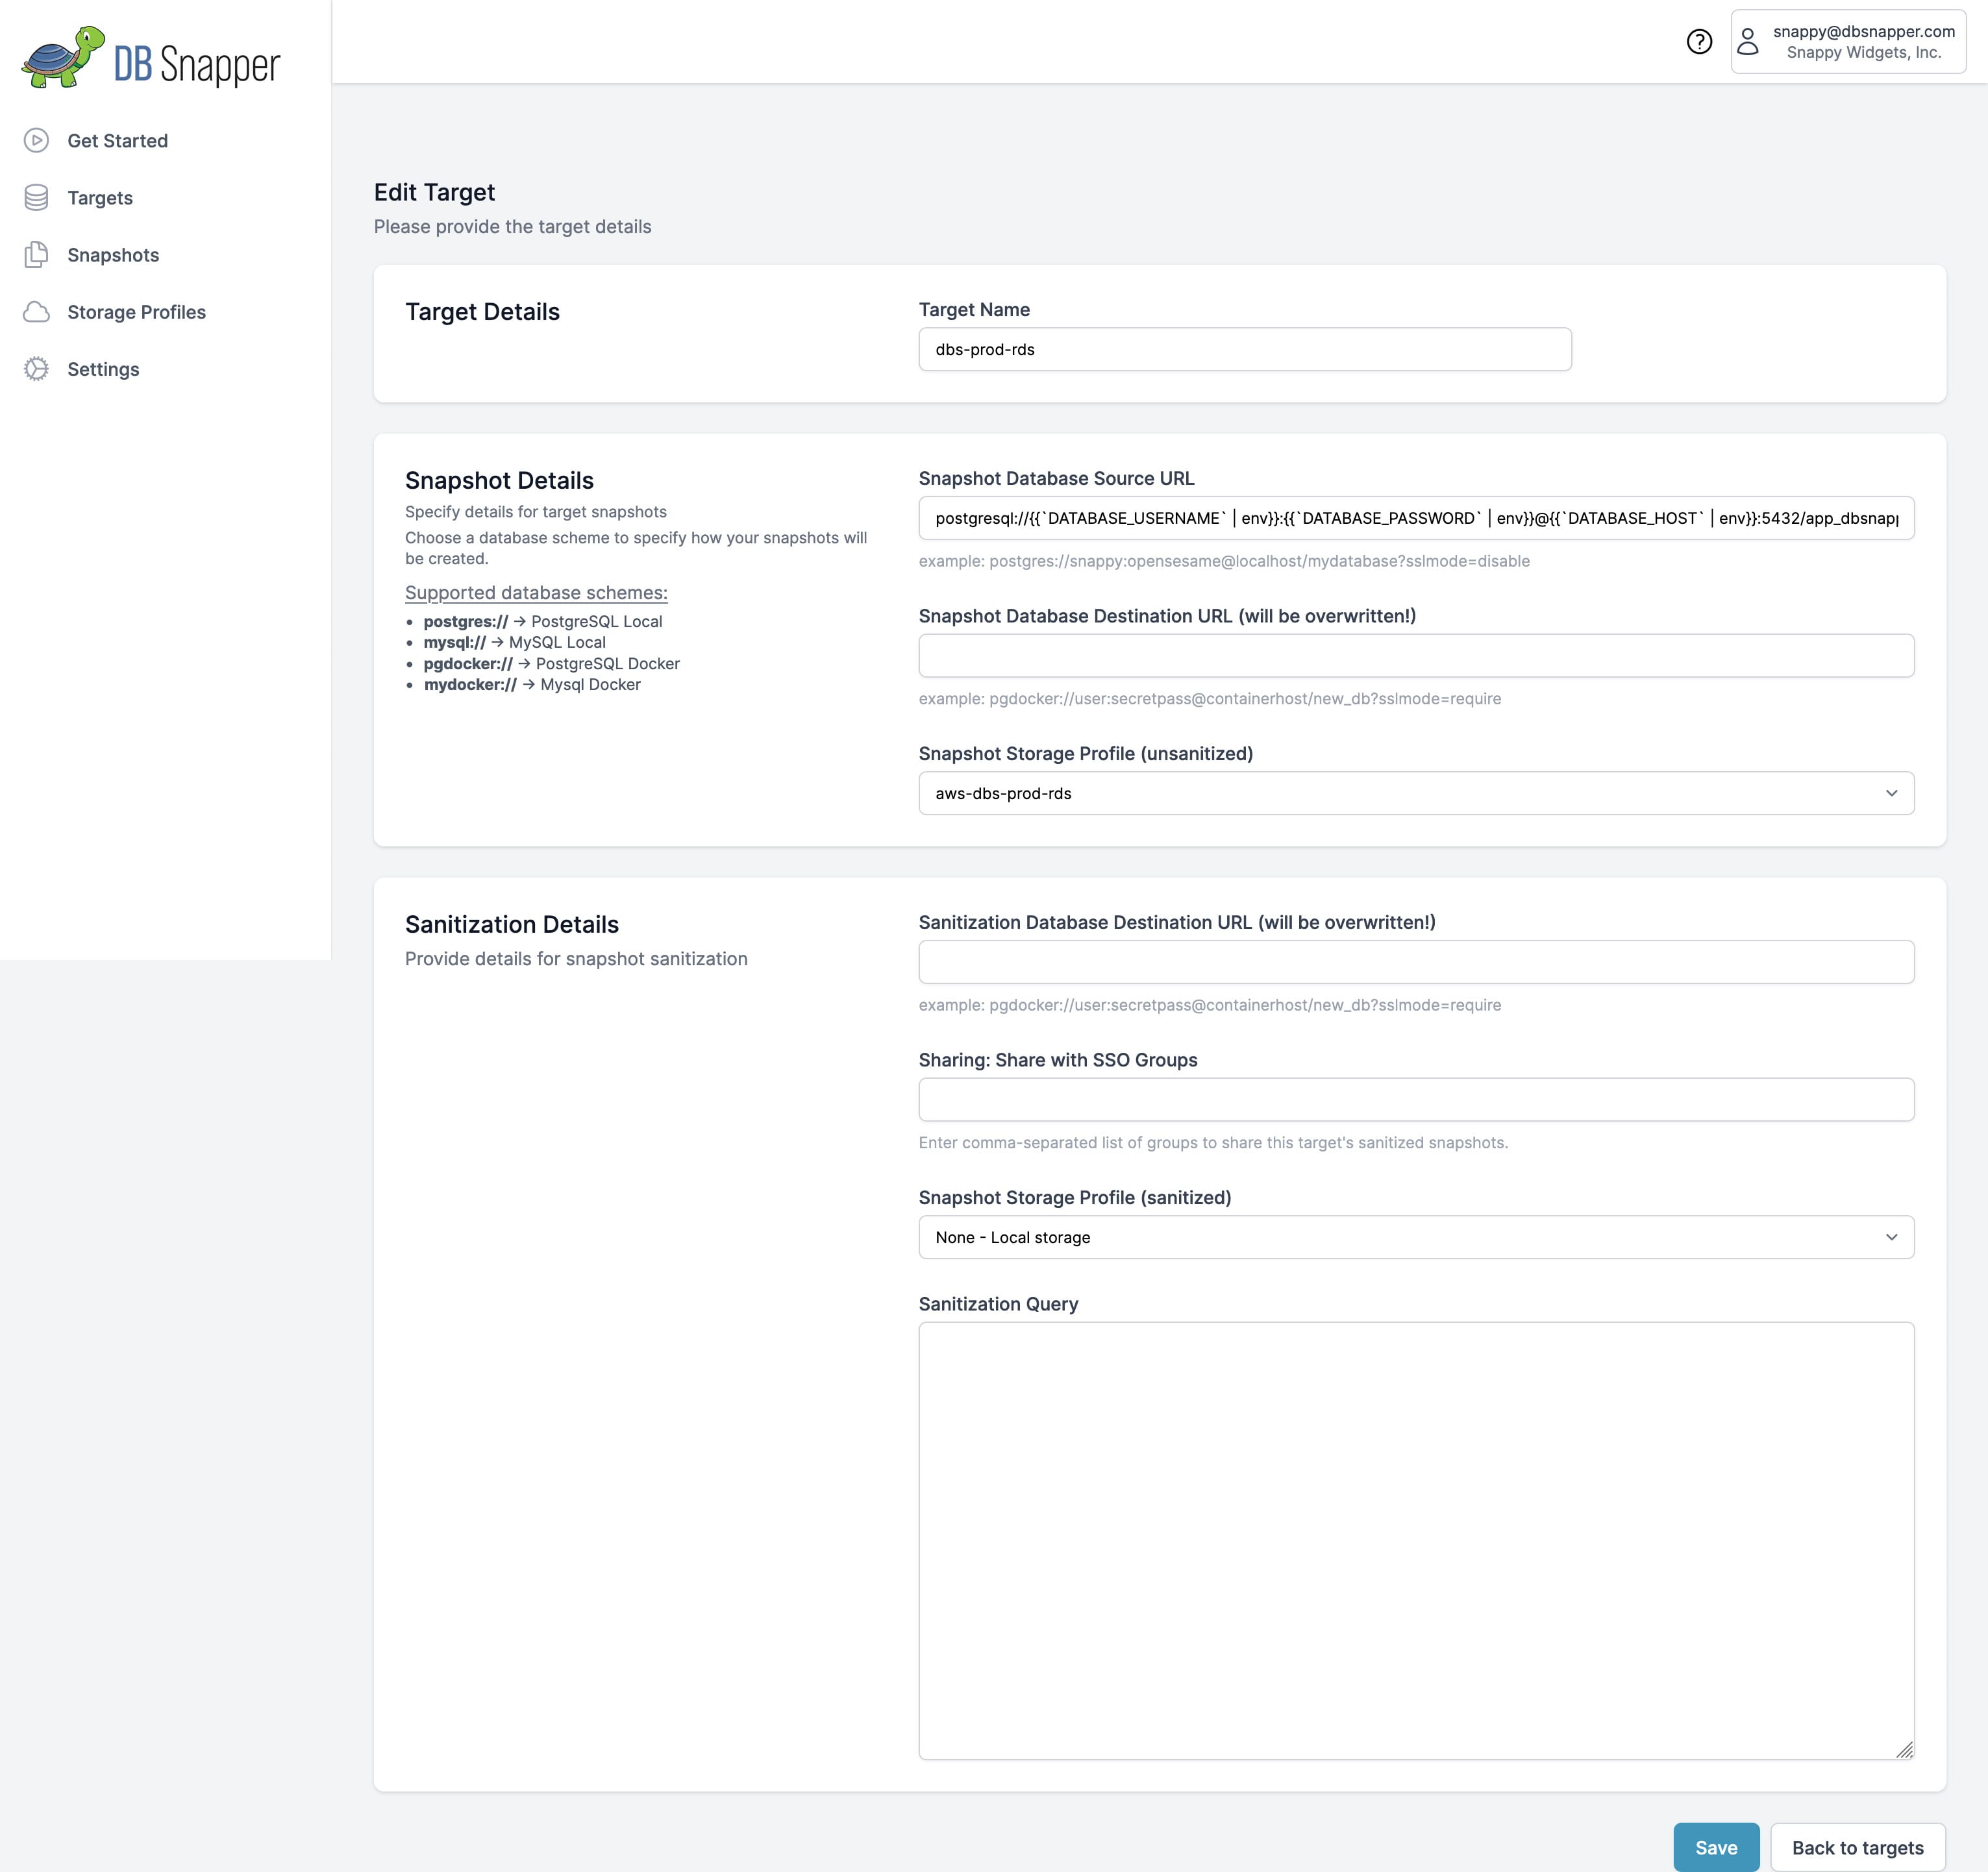
The target we've configured in the DBSnapper Cloud is called dbs-prod-rds. This target uses a Source URL connection string template allowing us to store sensitive connection information in GitHub Secrets.

Target settings for the dbs-prod-rds target.
This target definition also includes a storage profile that uploads our snapshot to an S3 bucket in our AWS account. Since we aren't doing anything with Sanitization yet, we just leve the Sanitization Detais empty.
Workflow Execution Output
When the workflow runs successfully, you should see output similar to the following:
As we can see above, the workflow first listed our targets as we requested on line 105 of the workflow. Here' we see the dbs-prod-rds target of interest. On lines 28-36 we see the output of the dbsnapper build command indicating that the snapshot was successfully built and uploaded to the cloud storage location specified in the target definition (line 35).
Cloud Storage Verification
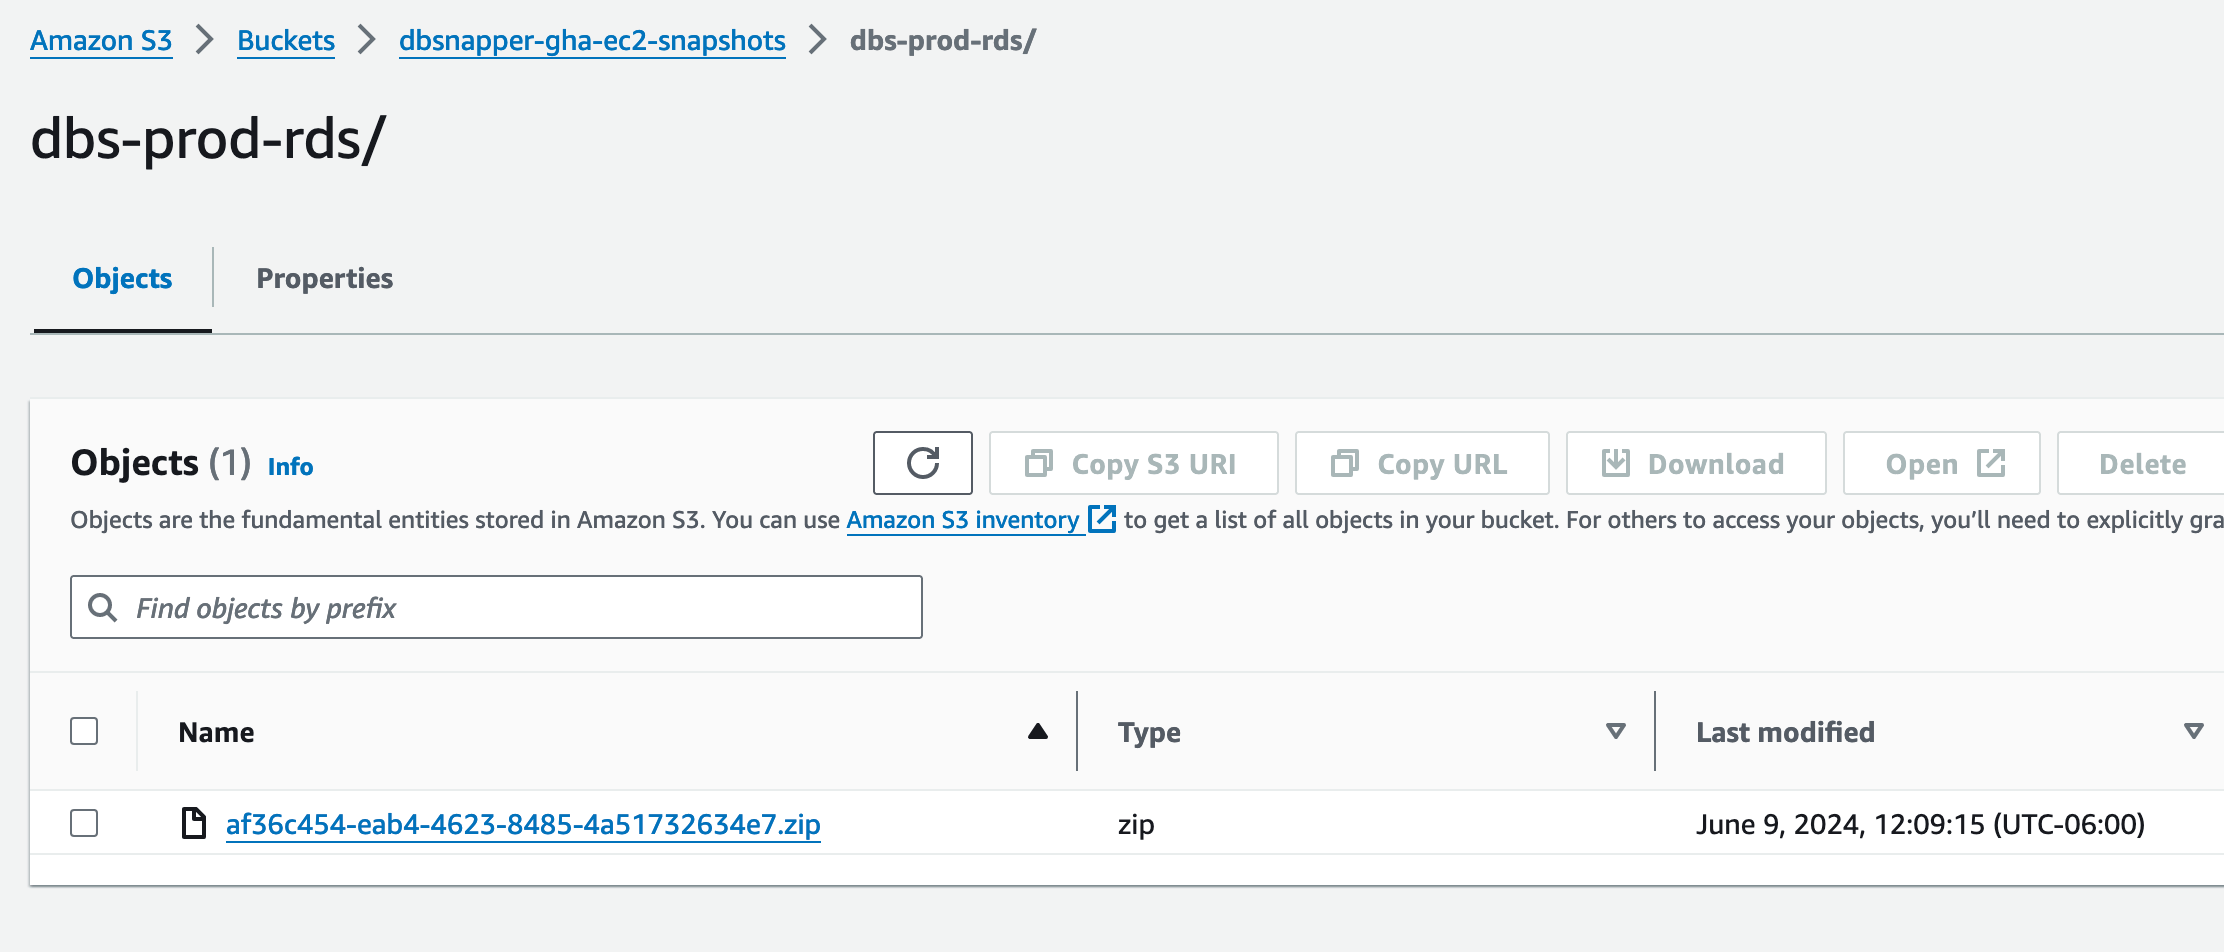
We can verify that the snapshot was uploaded to our S3 bucket by checking the bucket in the AWS Console. Here we see the snapshot file af36c454-eab4-4623-8485-4a51732634e7.zip in the bucket, which corresponds to the cloud ID of the snapshot we saw in the workflow output on line 35.

Listing of objects in our snapshot bucket on S3.
Now that we have a working, automated way to snapshot our database, we can include this workflow in our CI/CD pipeline to ensure that we always have the latest snapshot available as a point-in-time backup. We can use DBSnapper to create sanitized versions of these snapshots that we can share with our DevOps and development team for development and testing purposes.